How To Setup a Facebook Pixel Like a Pro
The Facebook Pixel, also known as Meta Pixel, is a piece of code that tracks and collects data on user activity on your website for optimizing and personalizing ads.
Setting up your Facebook Pixel can be a piece of cake with the right steps! The place to start? You’ll need to create the Facebook Pixel itself. Then comes the time to install the pixel on your web pages, and last, but most definitely not least, tell Facebook which conversion events on your web pages to track and target. If you run Facebook or Instagram ads or plan to get started with Facebook advertising soon, you will need a Facebook Pixel.
Why should you install a Facebook Pixel?
- Facebook conversion tracking: Installing a Pixel gives you a front-seat view of how users interact with your website after seeing your ad on Facebook or Instagram.
- Maximize ROI on ad spend: The Facebook Pixel helps put your ads in front of people who are most likely to perform desired actions on your website by using the data collected to increase conversion rates and improve ROI.
- Retargeting Facebook ads: Target your ads so that they are placed in front of users who have already visited your website but perhaps have yet to take the desired action.
- Build a lookalike audience: Target your ads to an audience that has similarities to those who have engaged with your website and will likely be interested in your business.
How to Setup a Facebook Pixel
Before you begin following the steps below, you will need to have two things in place:
- A business website.
- Access to update your website’s code.
Step #1: Create a Facebook Pixel
- Go to Events Manager & click Connect Data Sources (green + symbol).

2. Select Web.

3. Click Connect & add your pixel name.
4. Enter your website URL to check for easy setup options.

5. Click Continue.
Step #2: Install Facebook Pixel On Your Website
For the Facebook Pixel to work its magic, you need to install the code on your web pages. There are three ways to go about installing a Facebook Pixel to your website:
- Partner Integration: If you use any of Facebook’s integration partners, such as Squarespace or WordPress, you should select Use a partner, and you won’t need to use any coding.

- Email Instructions: If you work with someone else who edits the code on your website, or it is run by a developer, you will want to follow the steps to email them your Meta Pixel setup instructions by selecting Email Instructions.

- Manual Installation: If neither of the above setup options applies, then you will need to install your Facebook Pixel manually.
As described by the Meta Business Help Center, below are the steps to installing your pixel code manually.
1. Start by going to Events Manager.

Last step: Click Done!
Step #3: Set Up Facebook Pixel Events
Once your Pixel has been installed, you’ll want to identify what actions you want users to take on your website. By determining the conversion events you’d like to track, Facebook knows exactly how to target, optimize, and measure your ads. Facebook advertisers have the ability to set up a maximum of eight conversion events from a list of standard options that include:
- Add to Cart
- Add to Wishlist
- Add Payment Info
- Donate
- Find Location
- Lead
- Schedule
- Purchase
- Submit Application
To make your life easier, use Facebook’s point-and-click Event Setup Tool to receive suggestions on events based on button text throughout your website that matches standard Meta Pixel event names. This way, you can set up and manage events without needing code or help from a developer!
To properly set up Facebook Pixel events, follow these steps:
- Go to your Ads Manager account.
- Select Events Manager in the main menu.
- Click the Data sources icon on the left side of the page.
- Select the Pixel you’d like to use & click Settings.
- Select Open Event Setup Tool under Event Setup.
- Select your Facebook pixel ID, click the Settings tab, & scroll down to click the Open Event Setup Tool button.
- Enter the website URL and click Open Website.
- Review Facebook’s list of suggested events. Next to each listed event, click Review, then select either Confirm or Dismiss to finalize your decision.
- Once you’re content with the determined conversion events, click Finish Setup to continue.
*Note: At any point throughout your pixel setup, if you are interrupted, you have the option of going back to it at a different time through Events Manager.
Step #4: Double-Check That Your Pixel Is Working Correctly
According to Facebook’s best practices for Meta Pixel Setup, below are some different approaches you can take to make sure your pixel is working.
- Test Events Tool: Go to Meta Events Manager and use the Test Events tool to interact with your website and analyze the activity types and details displayed, along with any potential error messages.
- Page View Event: Visit one of the web pages that have the entire pixel base code installed and if the pixel is working properly, a page view event should get sent to Facebook. The page view event is automatically a part of your Pixel base code and will show up on your Pixel’s page in Events Manager.
- Facebook Pixel Helper Google Chrome Extension: If you use Google Chrome, install the Pixel Helper Chrome extension, visit the web pages where you have installed the pixel, and look out for a popup that will tell you how many pixels were found and/or any error information.
For a small piece of code, Facebook Pixel sure is mighty! In summary, if you’re running Facebook or Instagram advertisements, then the Facebook Pixel is an absolute must. Show your ads to the right people, drive more sales, and measure the results of your ads, all with the help of an efficiently set up Facebook Pixel!
![]()
Our aim is to bring our blend of social advertising and marketing automation to businesses across the country.
Client Success Stories
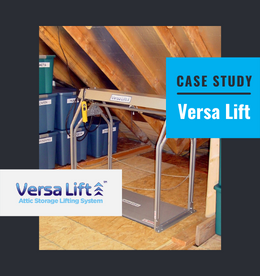
Versa Lift Attic Storage Systems’ Social Media Advertising Campaigns Reach Over 2 Million Users on Facebook & Instagram
Versa Lift by Byers Products Group is one of the best home storage systems on the market and has been driving results with SocialMadeSimple since 2018. Check out their case study to see how SocialMadeSimple’s Social Media Advertising campaigns have reached over 2 million people.

Get In Shape For Women Franchise Case Study
Get In Shape For Women participated in a 90-day marketing pilot program to generate customer leads and increase brand awareness affordably.
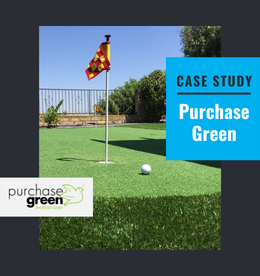
Purchase Green Artificial Grass Generates 25 Booked Appointments In 90-Day Franchise Marketing Pilot Program
Purchase Green is an artificial grass franchise that completed a 90-day Franchise Marketing Pilot Program with SocialMadeSimple… at zero cost! See how their lead generation ad campaigns effectively generated over 100 leads & boosted their brand awareness.