How To Verify Your Domain In Facebook Business Manager

What is Domain Verification?
Tell Facebook that you claim ownership of your website by following the process of everyone’s (not so) favorite step in Facebook advertising… Domain verification. Why does Facebook need verification? No, it’s not about Facebook’s trust issues. By verifying your domain, Facebook knows to associate your Page with your domain and gives only the rightful parties the green light to edit link previews and collect data for your website.
There are three different methods of verifying your domain in Facebook Business Manager, but you only need to choose one.
Add Your Domain in Facebook Business Manager
I know, I know – You’re eager to dive into the ways to verify your domain, but first things first. You need to actually add your domain in Facebook Business Manager before you can verify the domain.
As described by Meta for Developers, follow the steps below to successfully add your domain:
Start by opening Business Manager.
1. In the lower-left corner, click the ‘Settings’ button.

2. On the left, select the “More business settings” button.

3. Select the dropdown menu on the ‘Brand Safety’ tab and click ‘Domains’.

4. Enter your domain in the ‘Add a Domain’ pop-up and click ‘Add’.

3 Ways to Verify Your Domain in Facebook Business Manager
Option #1: DNS Verification
This approach involves adding TXT information to your DNS record.

- To start, open your domain host and navigate to the DNS settings of your website.
- In a separate tab, open Facebook Business Manager and once you’ve followed the proper steps to add your domain, select the desired domain.
- Under the DNS Verification tab, you will find a provided TXT entry. Add the TXT entry from Business Manager to your DNS configuration, but note that some domains may require an @ symbol added to the entry field.
- Once the changes have spread across the domain’s web servers, you can re-visit Business Manager and click the ‘Verify’ button at the bottom of the DNS Verification tab.
Note: Keep in mind that it can take up to 72 hours for the changes to spread across your website’s domain servers. You’ll know it’s complete once you see the status displayed as ‘Verified’ with a green dot.

Option #3: HTML File Upload
Speaking of HTML… Try out verifying your domain by uploading an HTML file to your domain host. This works in a similar way to the meta tag verification.

Once you’ve added your domain to Facebook Business Manager, open the ‘HTML File Upload’ tab. Once there, you’ll find an HTML verification file that you’ll want to download. When the file is downloaded, open up your website, and upload the file to the root directory (or root folder) of your website. Before clicking ‘Verify’, confirm the file is uploading by visiting the link provided under the ‘HTML File Upload’ tab.
Does the file upload look good? Go ahead and click ‘Verify’! Similar to the last note in the meta tag method, make sure you leave the HTML verification file as is in your website’s root directory.
How to Share Your Domain With Your Agency
If you are partnering with an agency for your social marketing needs rather than in-house, there are some additional steps you will need to follow to share your domain with them once it has been verified.
This all might sound like a lot of steps but, since you are the owner of your business’s website domain, the least complicated solution is for you to verify your domain in Facebook. Once the domain is verified, you are ready to share it with the agency in Facebook Business Manager.

How to share your domain with an agency in Facebook Business Manager:
- Login to Facebook Business Manager.
- Click on ‘Brand Safety / Domains’.
- Click on ‘Assign Partner’.
- Click ‘Connect your domain using your partner’s business ID’.
- Enter the agency’s business ID (which should be provided to you by the agency) and select ‘NEXT’.
- Notify the agency, and they can accept on their end to finalize.
Wrapping It Up
For you to do what you want and need on Facebook, you need a verified domain so Facebook can associate your Facebook Business Page with your website domain. Choose one of the three methods described in this article to verify your domain, share it with a marketing agency, and start driving success on Facebook.
Hit any domain verification roadblocks along the way? Happens to the best of us! Take it to Meta For Developers to help you debug.
![]()
Our aim is to bring our blend of social advertising and marketing automation to businesses across the country.
Client Success Stories
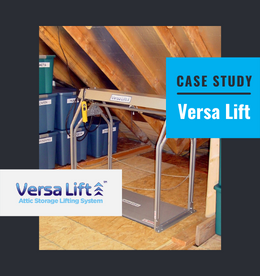
Versa Lift Attic Storage Systems’ Social Media Advertising Campaigns Reach Over 2 Million Users on Facebook & Instagram
Versa Lift by Byers Products Group is one of the best home storage systems on the market and has been driving results with SocialMadeSimple since 2018. Check out their case study to see how SocialMadeSimple’s Social Media Advertising campaigns have reached over 2 million people.

Get In Shape For Women Franchise Case Study
Get In Shape For Women participated in a 90-day marketing pilot program to generate customer leads and increase brand awareness affordably.

Purchase Green Artificial Grass Generates 25 Booked Appointments In 90-Day Franchise Marketing Pilot Program
Purchase Green is an artificial grass franchise that completed a 90-day Franchise Marketing Pilot Program with SocialMadeSimple… at zero cost! See how their lead generation ad campaigns effectively generated over 100 leads & boosted their brand awareness.